
Ninja trading Guide
![]()
Find the Platform
To download the NinjaTrader platform, open any web browser and search for «NinjaTrader: Futures Trading».
- Once on their official website, you will find a prominent button labeled «GET STARTED.» Click on it to begin the registration process.

Register with Your Email Address
- Enter your email address in the designated field and click «SIGN UP.»

- Shortly after, you will receive a confirmation email in your inbox. This email will include a link to verify your account.
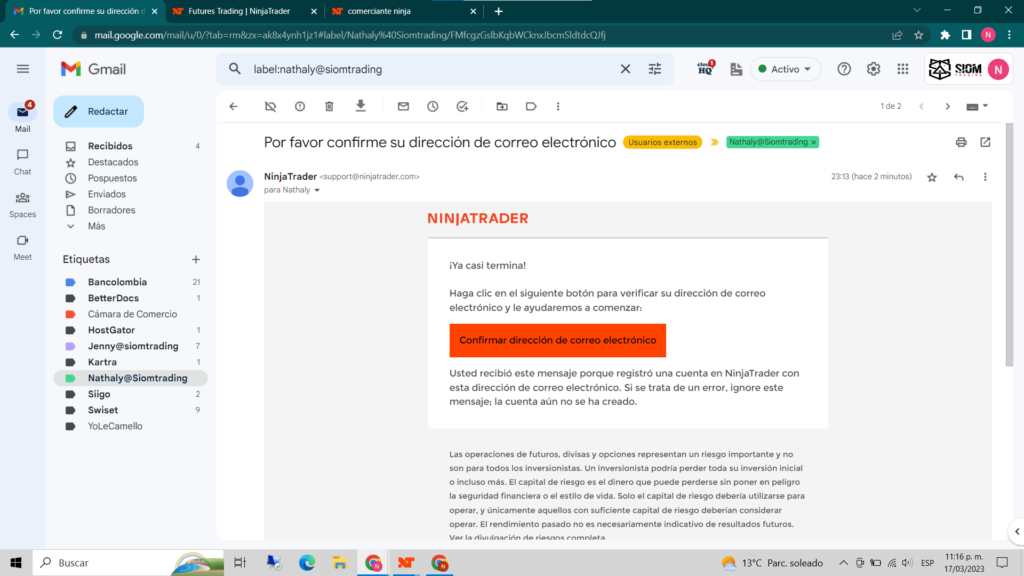
- Click on the «Confirm Email Address» button in the email. This will open a new page where you can create a username and password.
- These credentials will be used to log in to both the web and desktop versions of NinjaTrader.
- Be sure to write them down and store them securely.
- Accept the terms and conditions, then click «Create User» to complete the process.
Congratulations! Your account is now ready for use.
Set Up Your Demo Account
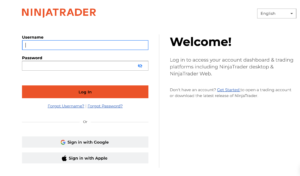
Log in with your credentials.
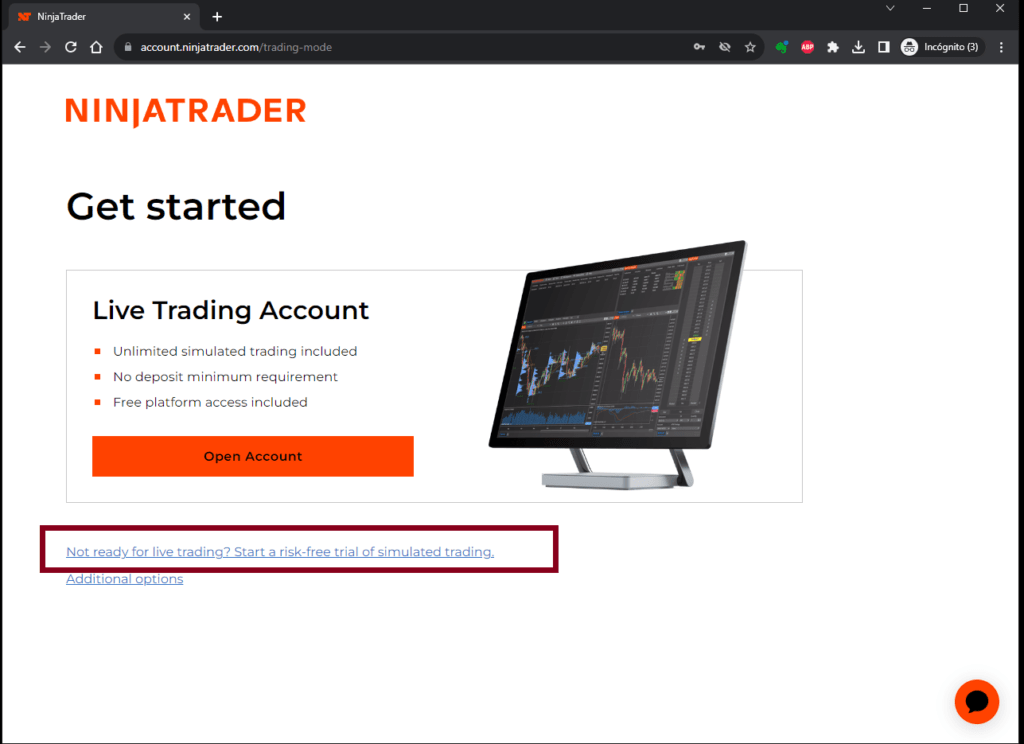
The platform will present three main options. For this tutorial, select:
«Not ready for live trading? Start a risk-free trial of simulated trading.»
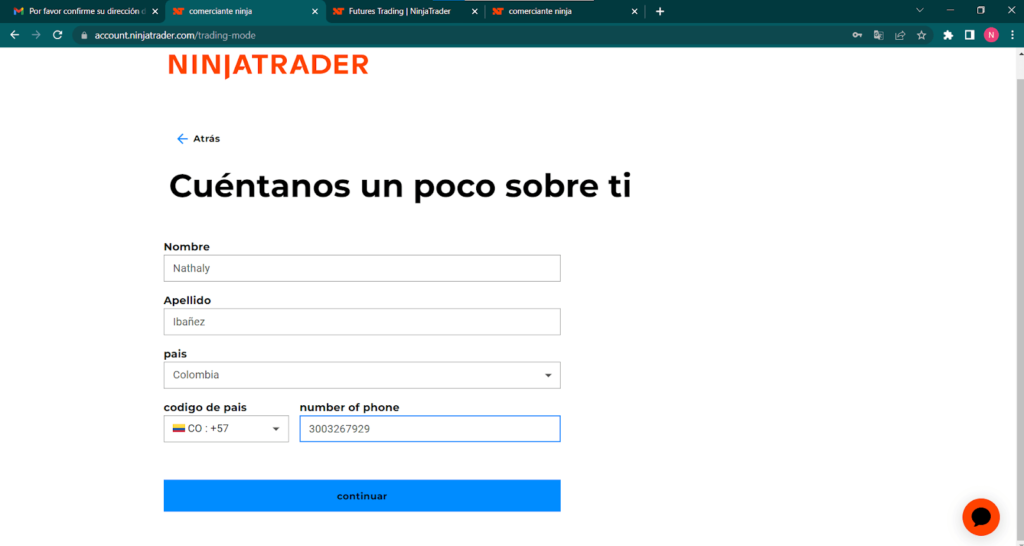
Complete the form with your personal information, including:
First name, Last name
- Country
- Area code and Phone number
- Once all fields are completed, click «Continue.»
Download and Install NinjaTrader 8
- In your demo account section, look for the «Download» option.
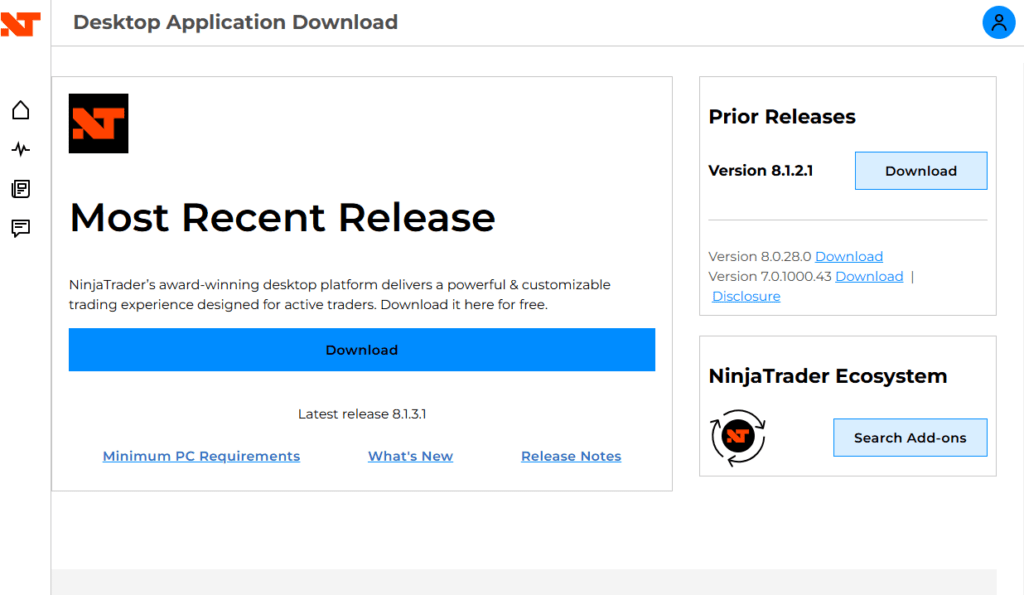
- Click the link to download the latest version of NinjaTrader 8 for desktop.
- When the download is complete, start the installation process.
- Follow the on-screen steps, accepting the terms and conditions to proceed.
- You may see a pop-up asking for permission to make changes to your device. Select «Allow» to continue.
- Once the installation is complete, you will find the NinjaTrader icon on your desktop.
Access NinjaTrader
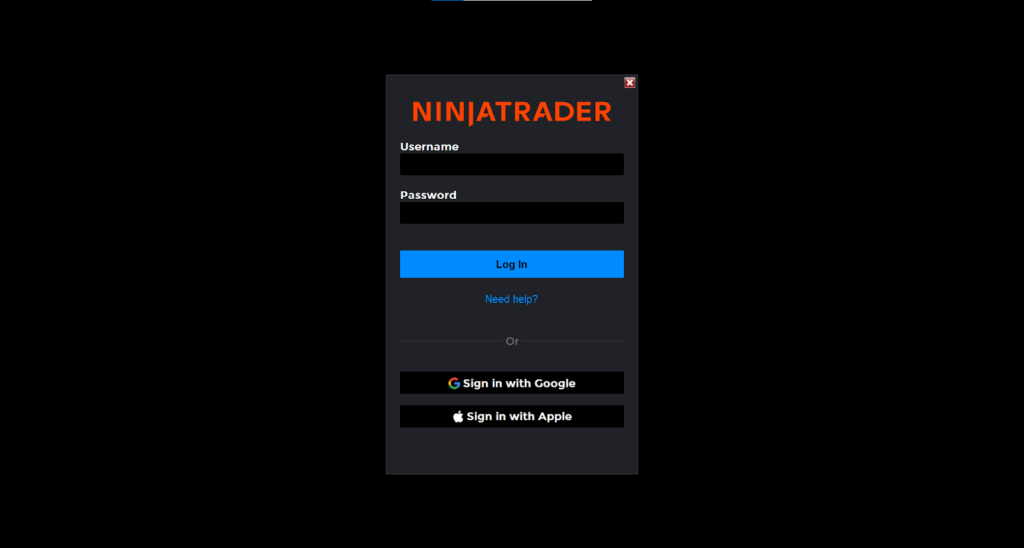
- Open the «NinjaTrader8» icon on your desktop to launch the program.
- You will be directed to the login screen, as shown in the example image.
- Log in using:
- Google, Apple, or the Username and Password you previously created and saved.
- Note: Each time you access NinjaTrader, you will need these credentials for security purposes.
Familiarize Yourself with the Platform
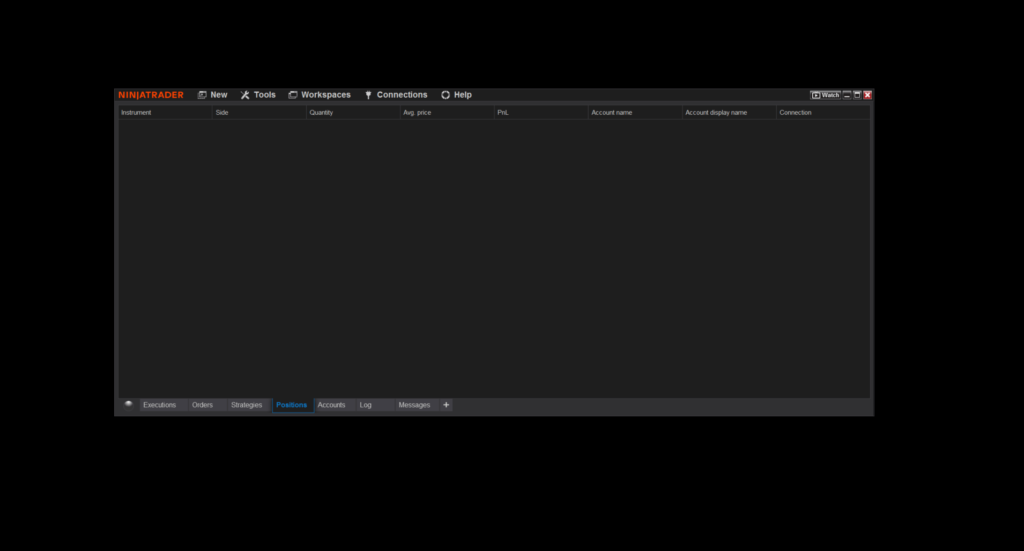
- After logging in, the NinjaTrader control panel will open, along with some additional pop-up windows.
- You can close these for now, as they are not needed immediately.
- Explore the platform and take your first steps in trading.
Demo or Live Account Options
Once logged in, you will see two additional options:
- Live Account: For operating with your own capital.
- Simulation: A free demo account valid for 14 days.
Choose the simulation option to practice risk-free trading before transitioning to a live account.
In the previous tutorial, we learned how to download and install NinjaTrader, as well as create and connect a demo account. Now, we’ll take the next step by configuring three essential aspects of the desktop platform for optimal operation, preparing it for a funding test or live account. Let’s get started!
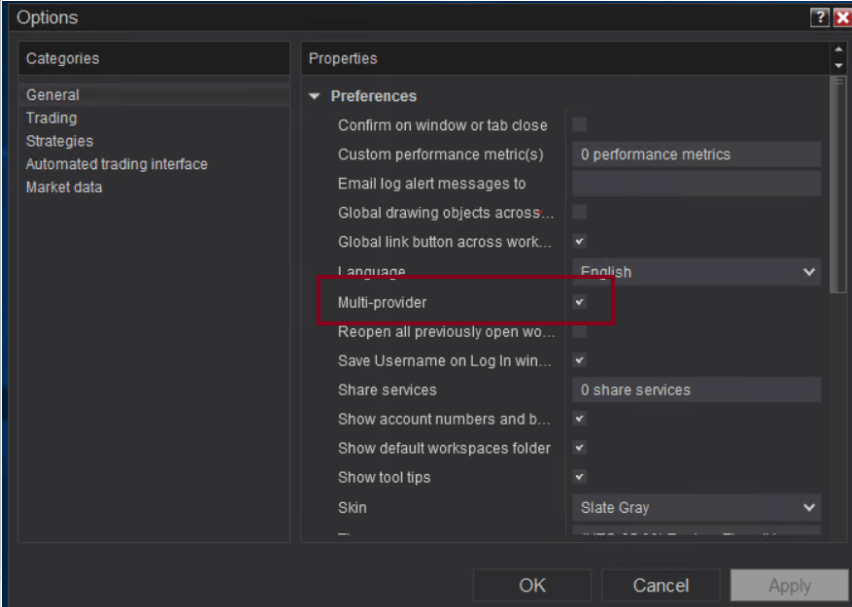
Enable the Multi-Provider Option
If you plan to operate with multiple accounts (demo, funded, or live), it is crucial to enable the Multi-Provider feature to manage all connections from a single platform. Follow these steps:
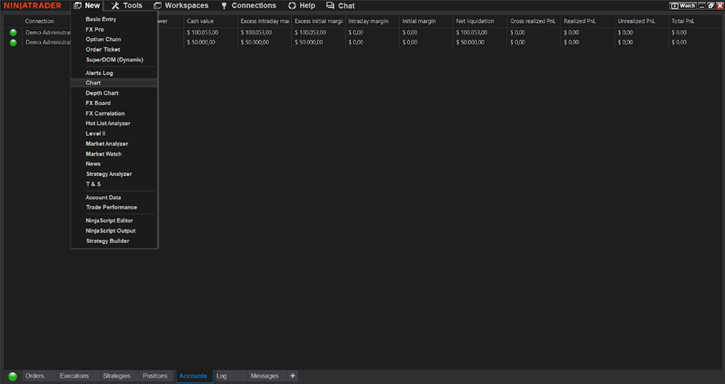
- In the Control Panel, go to the Tools menu.
- Click on Options.
- Locate and activate the Multi-Provider checkbox.
- Press Apply and then OK.
- Restart NinjaTrader for the changes to take effect.
💡 Tip: Without this option activated, you won’t be able to connect multiple accounts, limiting your operational flexibility.
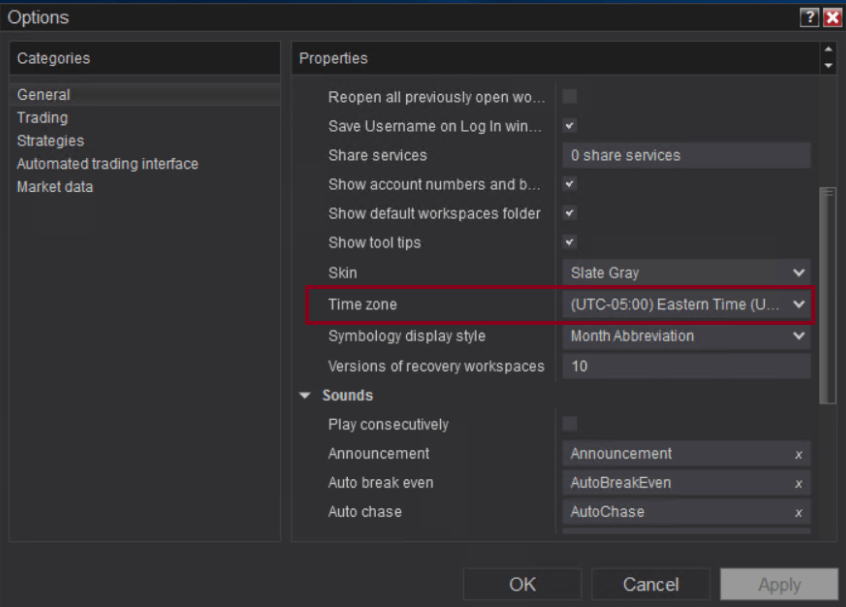
Set the Time Zone
Synchronizing strategies with the correct time zone is key to ensuring that orders execute at the right moment. The recommended time zone for NinjaTrader is UTC-5:00, corresponding to Eastern Time (U.S. and Canada).
- Go to Tools and select Options.
- Find the TimeZone Setting configuration.
- Choose UTC-5:00 and save the changes.
- Restart NinjaTrader to apply the new configuration.
💡 Reminder: Incorrect time synchronization can disrupt your strategies, especially time-sensitive ones like automated trading.
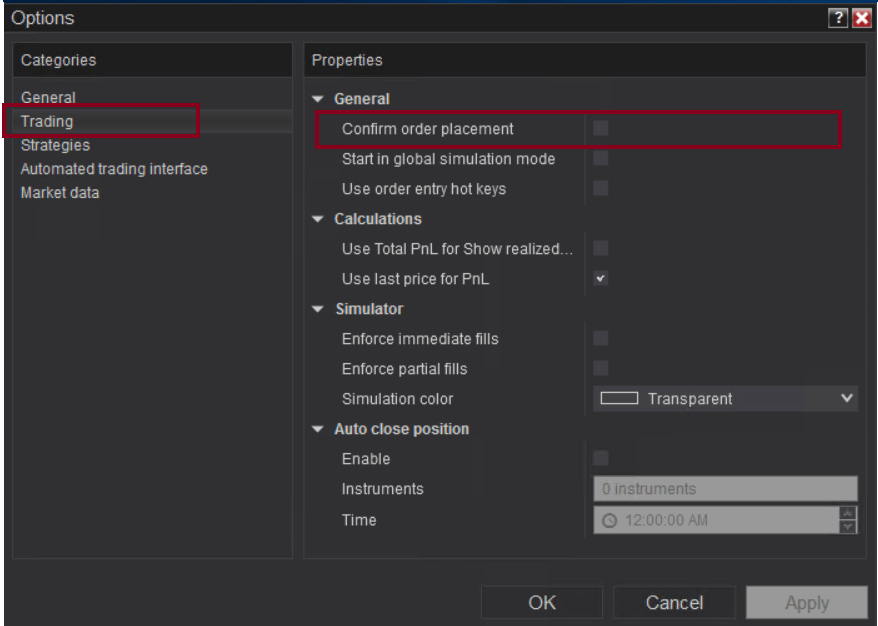
Disable Order Confirmation
To efficiently execute automated strategies, it’s better to disable the Order Confirmation feature. This prevents the system from requesting additional validations for automatic operations.
- In the Control Panel, open Tools and select Options.
- Navigate to the Trading section.
- Uncheck the option Confirm Order Placement.
- Save the changes and restart the platform.
💡 Suggestion: While this accelerates the process, make sure to thoroughly review your strategies beforehand to avoid unexpected errors.
Additional Tips to Optimize NinjaTrader
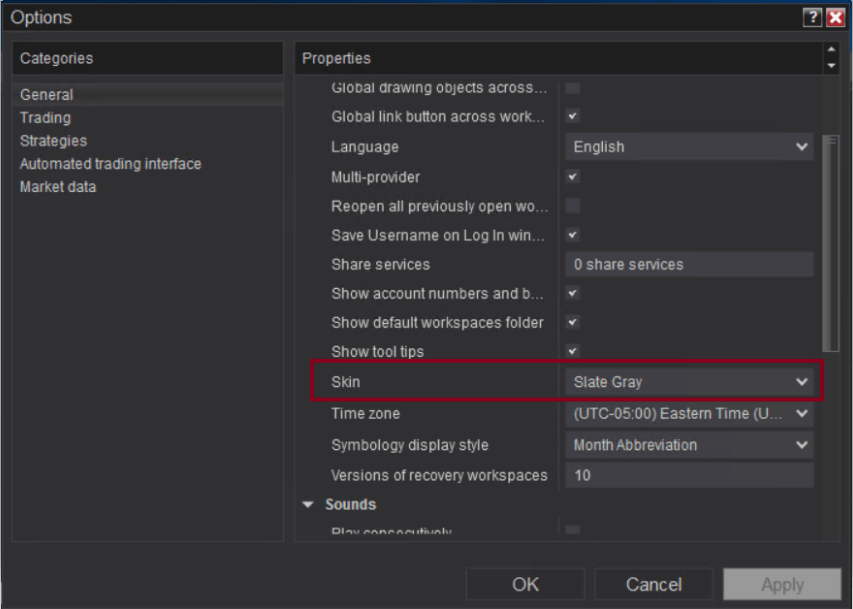
Adjust the Platform Background
Good visualization is essential for comfortable operation. If you prefer a dark background like we do, adjust the platform’s theme as follows:
- Go to Tools and select Options.
- Find the Skin option.
- Choose the color or design that suits you best and save the changes.
Organize Your Workspace with Workspaces
Saving your graphical setup and favorite assets is very useful for working efficiently. Use the Workspaces feature to achieve this:
- In the Control Panel, select Workspaces – New.
- Configure your workspace and save it so it remains intact the next time you open the platform.
With these basic configurations and additional tips, you’re ready to trade more efficiently and comfortably on NinjaTrader.

Keep optimizing your experience and master every tool on the platform!
Connecting a Funded Trading Test
This tutorial will guide you step-by-step to connect a funded trading test in NinjaTrader using Rithmic as your data provider. Follow these instructions to set everything up correctly and start trading.
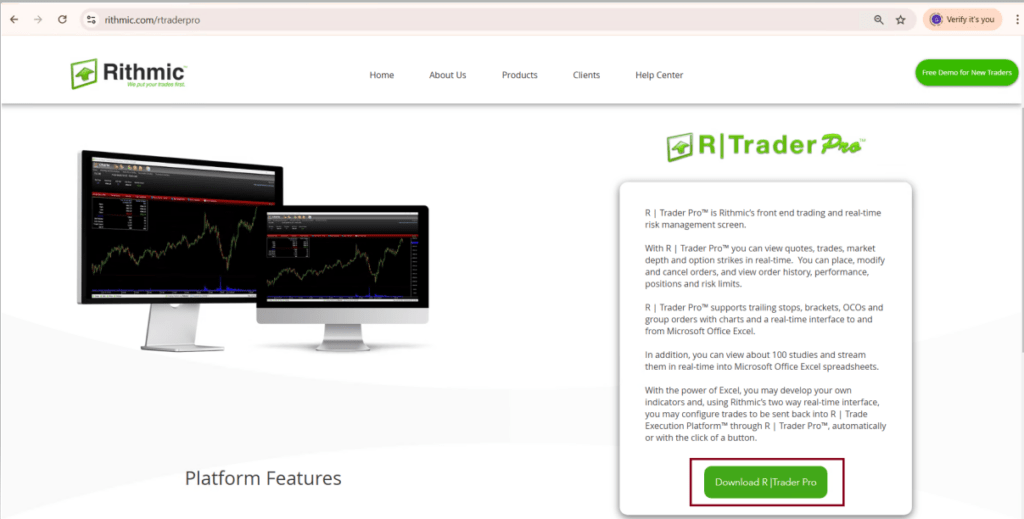
Step 1: Download and Install Rithmic
- Open your browser and search for “Rithmic”.
- Go to the official download site (Rithmic Downloads).
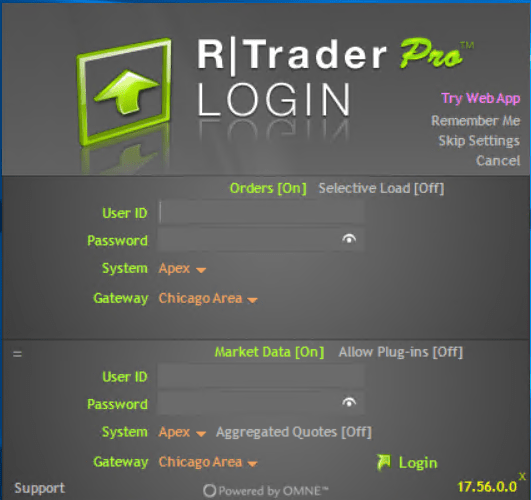
- Select the RTrader Pro option and click Download.
- Once the download is complete, run the installer.
- Accept the terms, click Next at each step, and select Yes if the system requests permissions.
- Finish the installation by clicking Finish.
Step 2: Configure Rithmic
Set up Rithmic to work with your funded trading test:
- Open Rithmic.
- On the login screen, enter the username and password provided by your funding company (typically sent via email or available in their portal).
- In the System field, select the server specified by the funding company.
- Set the location to Chicago.
- Disable the market data option.
- Click Login to connect.
Step 3: Accept the Agreements
When logging in for the first time, you will need to accept a few agreements:
- Read each contract carefully.
- For the second agreement, select the non-professional option (if applicable).
- Sign and accept to proceed.
Step 4: Import the License into NinjaTrader
Link your funded trading test by importing the license key into NinjaTrader:
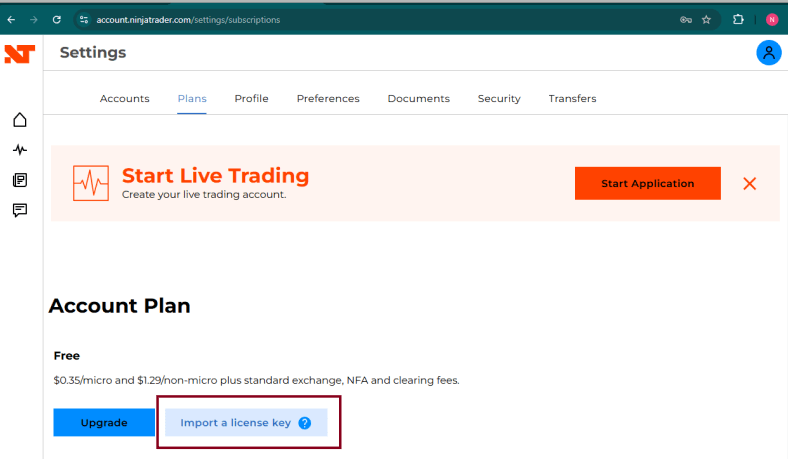
- Log in to the NinjaTrader web portal using your username and password.
- In your personal dashboard, click the Login icon (blue icon at the top).
- Go to Settings and select the Plans tab.
- Find the option to Import License Key.
- Enter the license key sent by the funding company via email.
- Save the changes and log out.
Step 5: Connect Rithmic in NinjaTrader
Now link Rithmic to NinjaTrader:
- Open NinjaTrader.
- Log in using your NinjaTrader portal credentials.
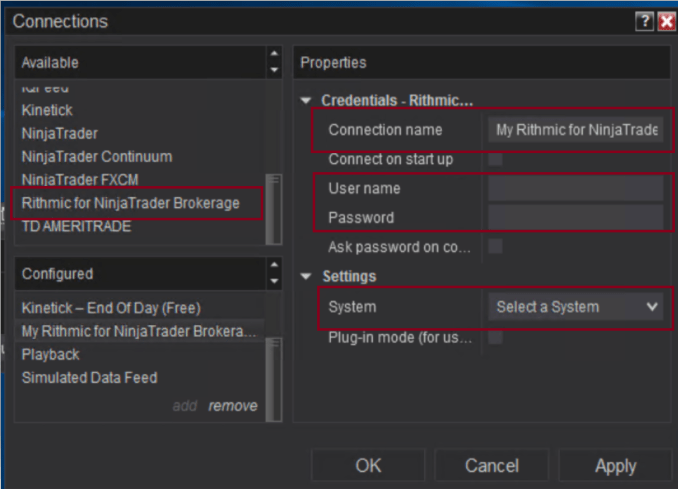
- In the Control Panel, go to the Connections menu and select Configure.
- From the list of available connections, choose Rithmic for NinjaTrader and configure:
- Connection Name: Assign an easily recognizable name (e.g., “Rithmic Funding”).
- Username and Password: Enter the same credentials used in Rithmic.
- System: Select the same system you configured in Rithmic.
- Click Apply and then OK.
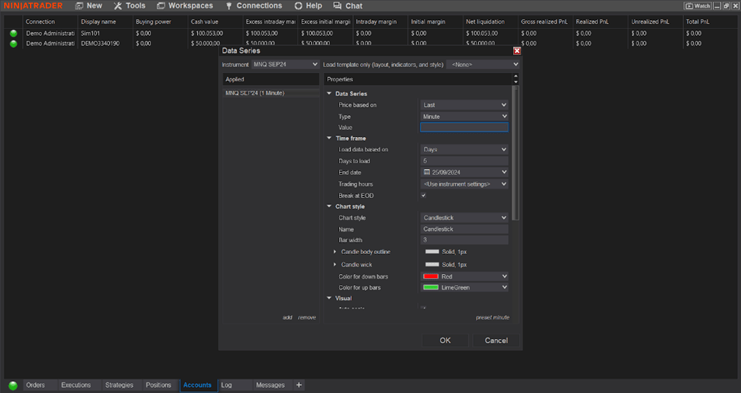
Step 6: Confirm the Connection
Verify the connection to ensure everything is working properly:
- In the Connections menu, select the newly created account.
- Ensure the connection icon turns green.
- Go to the Accounts tab in NinjaTrader.
- You should see:
- A live account with an initial balance of $50,000.
- A demo account with an approximate balance of $100,000.
Ready to Trade!
By following these steps, you will have successfully connected your funded trading test to NinjaTrader via Rithmic. Always verify your connection before trading to avoid any issues. Happy trading!

How to Create ATM Strategies
In this chapter, you will learn how to set up an ATM (Automated Trading Management) strategy, a trailing stop, or a system to automate your trading objectives upon entering the market.
What is an ATM and How Does It Work?
Creating a proper entry into the market involves understanding three fundamental factors:
Entry Point
The specific price where you take a position, whether long (buy) or short (sell).
Risk and Reward
Every trade has two possibilities: moving in your favor or against you.- Define the risk you are willing to take, i.e., the maximum loss you can accept (Stop Loss).
- Set the reward you aim to achieve (Take Profit).
- Clearly outline these levels before entering the market to manage probabilities effectively.
Risk-Reward Ratio
Your expected profit should relate proportionally to your assumed risk.- For example, if you risk $100 and aim for $300, the ratio is 1:3.
- This ratio ensures a balance between potential rewards and losses.
By defining your assumed risk and profit targets, you establish a foundation for successful trading. An ATM strategy automates these objectives, ensuring consistent execution. It allows you to predefine Stop Loss and Take Profit levels, set the number of contracts, adjust ticks per objective, and more.
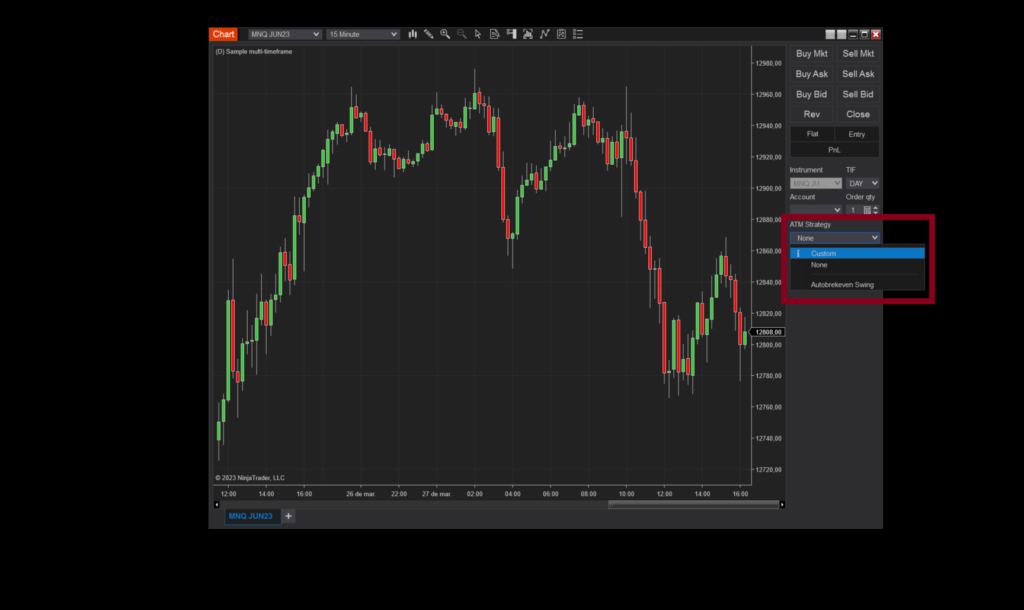
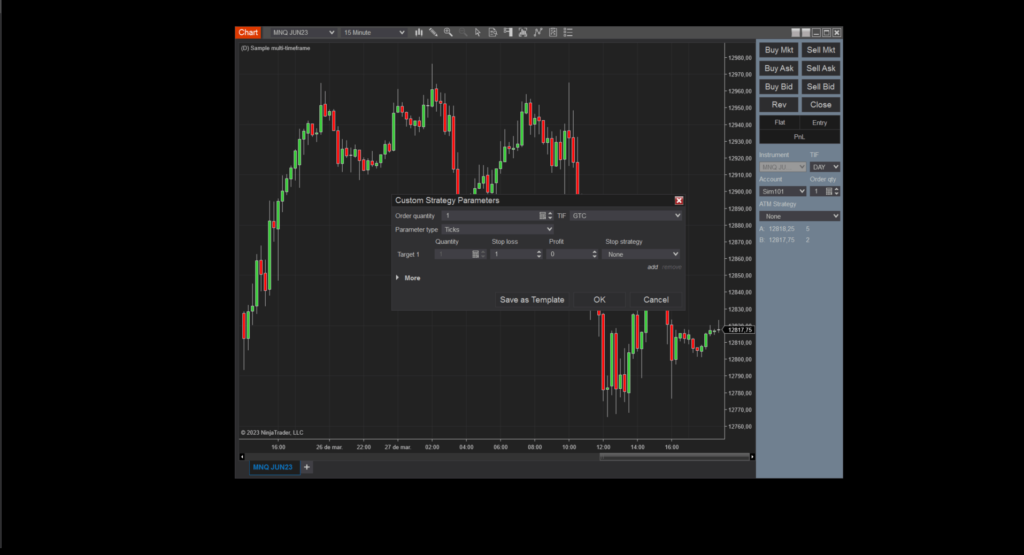
How to Set Up an ATM in NinjaTrader 8
- Open your trading chart and locate the Chart Trader on the right side.
- In the Chart Trader menu, find the ATM Strategy dropdown.
- Select Custom to create a personalized ATM strategy.
Customizing Your ATM Strategy
After selecting Custom, a new window will appear where you can define the parameters for your ATM strategy.
- Stop Loss and Take Profit: Set levels based on your trading objectives.
- Position Size: Define the number of contracts to trade.
- Ticks per Objective: Determine precision levels for each trade target.
- Order Management Options: Include trailing stops and position reversals.
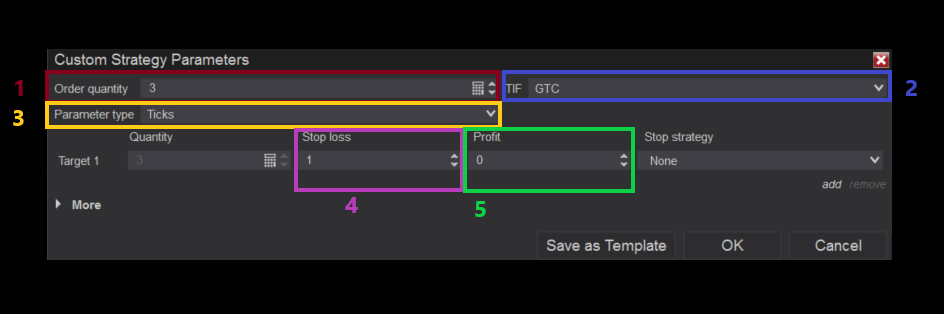
Detailed Options in ATM Setup
- Order Quantity: Number of contracts to trade.
- TIF (Time in Force):
- Choose whether the order remains active for the session, closes when a target or stop is reached, or closes manually.
- Parameter Type: Choose the measurement for your strategy:
- Currency: Monetary value.
- Percent: Percentage of your account.
- Price: Specific price level.
- Ticks: Minimum price movement for the instrument (precise measurement).
- Pips: Larger price unit than ticks (common in Forex).
- Stop Loss: Set your risk limit according to the selected parameter.
- Profit Target: Set your reward target based on the chosen parameter.
To log in to your VPS, simply open the Remote Desktop Connection application and:
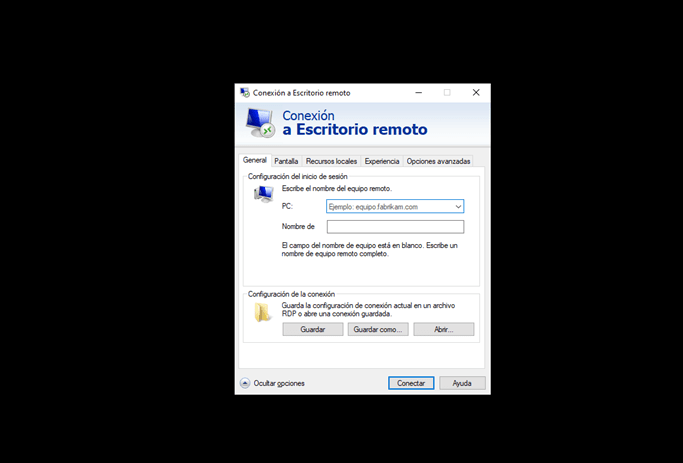
- In the “PC” section, enter the primary IP address sent to you via email.
- In the “Username” field, type the username provided in the email.
- You can choose to save the credentials to make it easier to log in in the future.
- After clicking “Connect”, you will be prompted for a password. Simply enter it and click “Connect”.
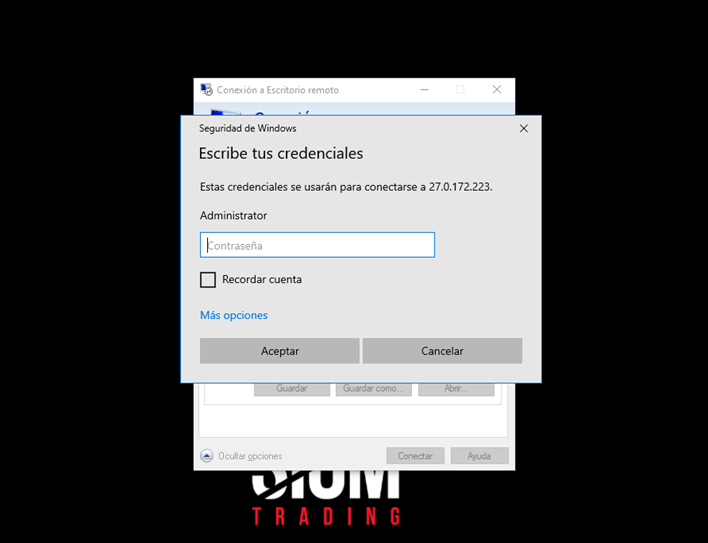
You are now ready to perform your trading operations from anywhere at any time.
How to Download Our Systems (Bots and Indicators)
In this section, we will guide you on how to correctly install the systems (Bots and Indicators) you acquired through your subscription.
Accessing the Download Section
- Visit the SiomTrading website and log in to the «My Account» section using your username and password.
- Navigate to the «My Downloads» section.
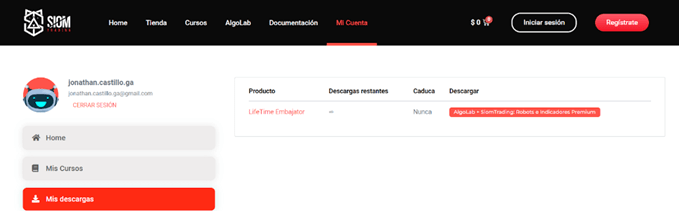
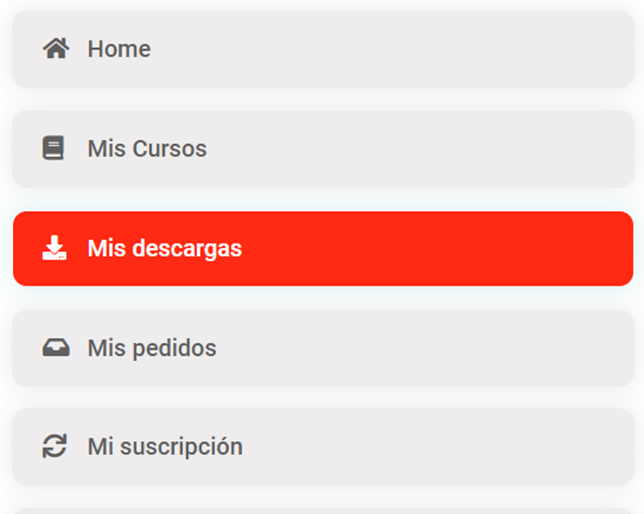

Downloading the Systems
- In the «My Downloads» section, click the red «Download» button located at the bottom.
- All the systems will be downloaded as a single compressed folder.

Handling Security Warnings
- If your browser displays a security warning, select «Keep» or «Save» to proceed with the download.
Ready for Installation
- Once the download is complete, the systems are ready to be installed on NinjaTrader 8.
- Important: Do not extract or decompress the downloaded folder.
Follow these steps to ensure a smooth download and installation process.
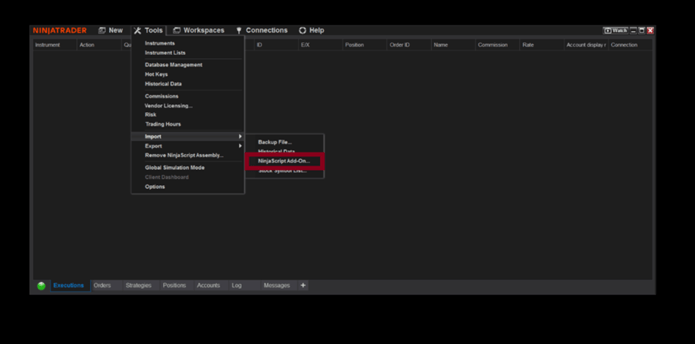
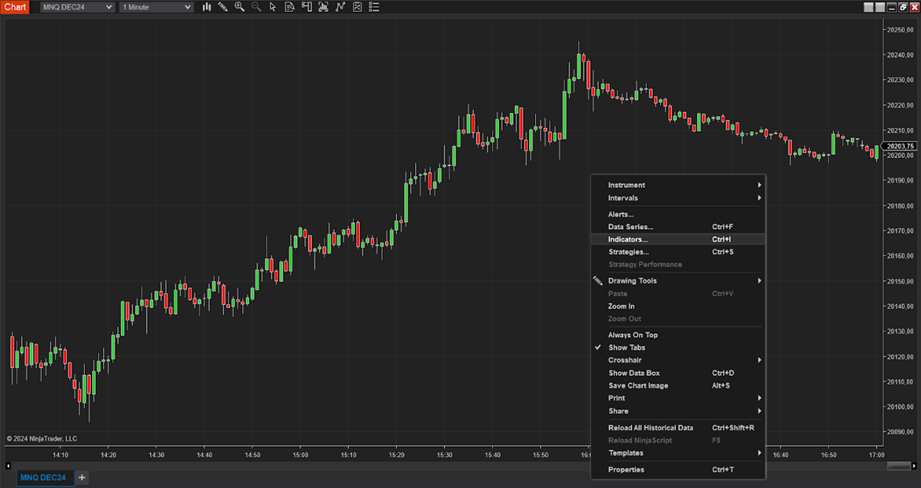
Open the Import Menu
- Go to the Control Panel of your NinjaTrader platform.
- Click on Tools in the menu.
- Select Import, then choose NinjaScript Add-On.
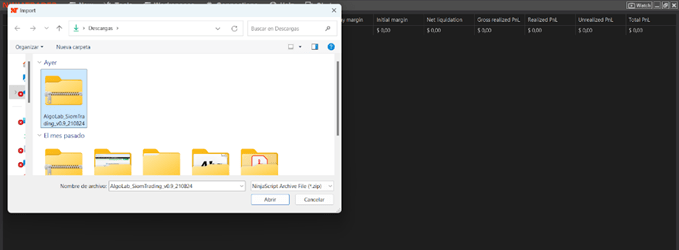
Select the Downloaded File
- A window will appear. Navigate to and select the compressed folder you downloaded earlier.
- Click Open to proceed.
Confirm Installation
- NinjaTrader will display a warning about installing a third-party add-on.
- Click OK to confirm.
- Wait for the system to notify you that the installation was successful.
- Click OK again to finalize the process.
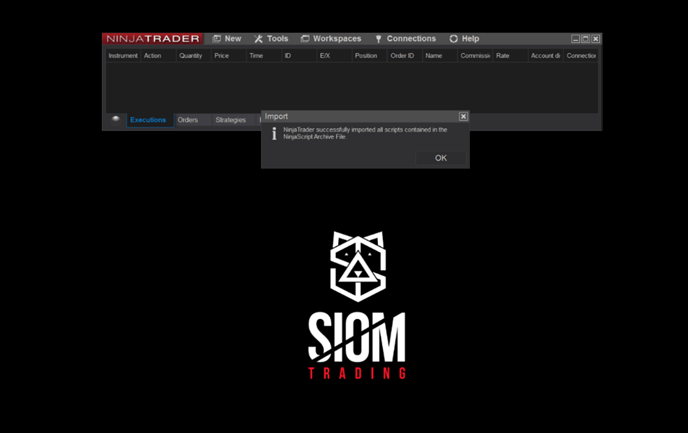
Your bot or indicator is now installed correctly and ready to use on NinjaTrader 8!
How to Update Our Systems (Bots and Indicators)
If you encounter a conflict or duplication issue when installing a SiomTrading indicator, follow these steps to resolve it and successfully reinstall the indicator.
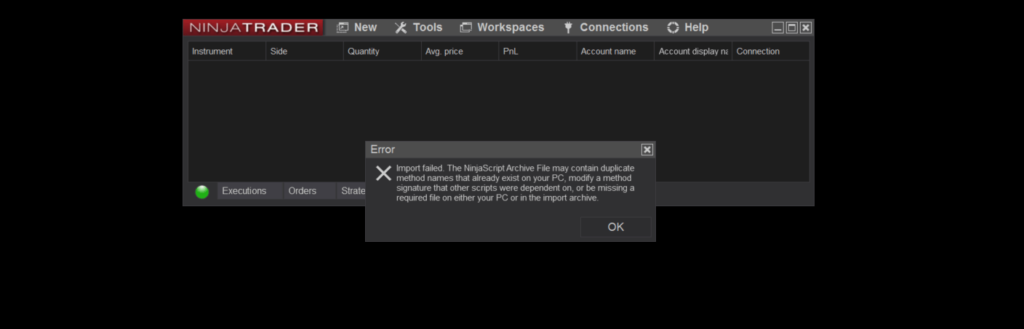
Identifying the Issue
When an installation fails due to method name duplication, NinjaTrader will display an error message indicating the problem. This message typically points to an existing indicator in your system that conflicts with the new one.
Removing the Conflicting Indicator
To remove the conflicting indicator from NinjaTrader:
- Go to the Control Panel of NinjaTrader.
- Open the Tools menu and select Remove NinjaScript Assembly…
- A window will appear listing all installed indicators and scripts.
- Identify the conflicting indicator and select it.
- Click Remove and wait a few moments while the platform completes the removal process.
- Once done, click Close to exit the removal menu.
Reinstalling the Indicator
After removing the conflicting indicator:
- Retry the installation of your SiomTrading indicator by following the standard installation process.
- Ensure no further conflicts are present, and proceed as usual.

Your platform is now updated and ready to use with the new indicator!
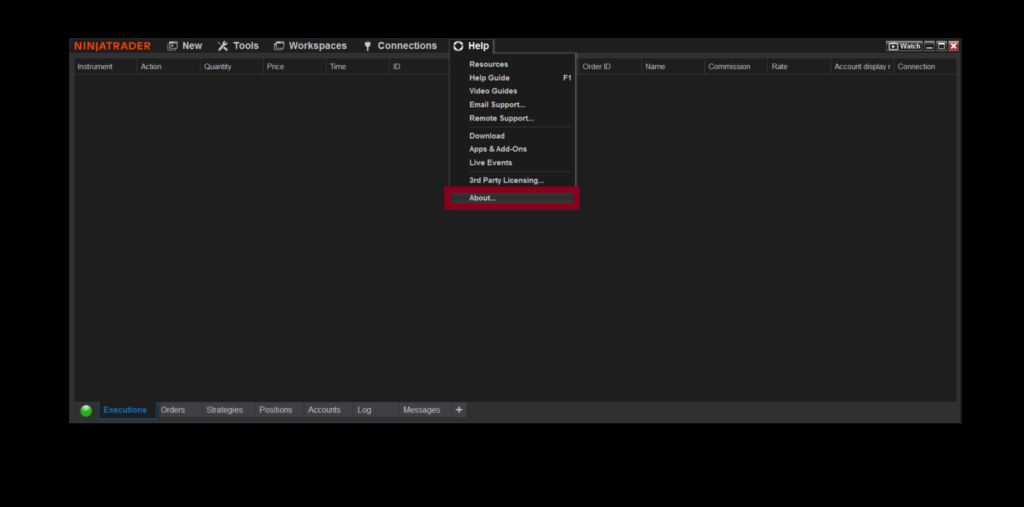
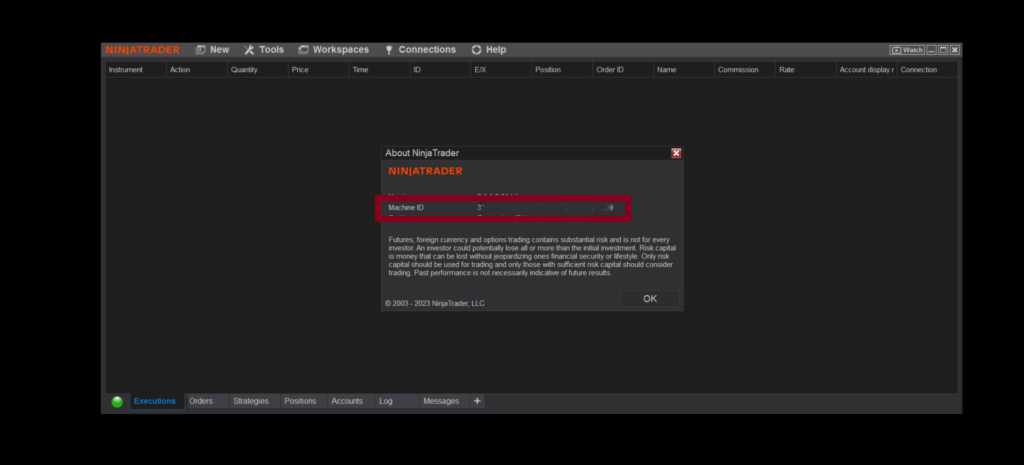
Locate and copy your Machine ID.
Send Your Machine ID
- Email your Machine ID to Bluechp support at.
- Ensure you send it as plain text (not an image).
Await Activation Instructions
- Once you’ve sent your Machine ID, SiomTrading will respond with an email containing the next steps for activation.
Your systems will be licensed and ready for use after completing these steps.
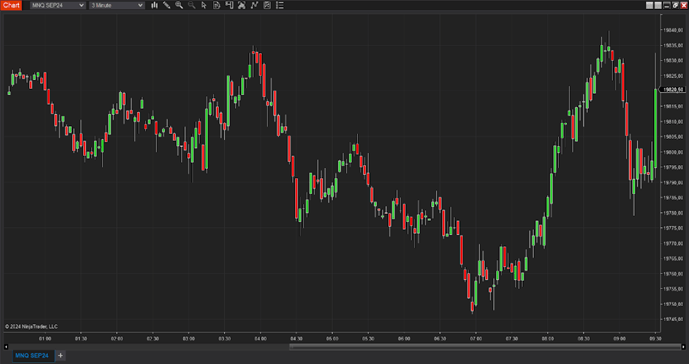
- In the dropdown menu, select the asset you wish to trade.

Choose the time frame:
- Set the Type (e.g., minutes).
- Define the time interval for price plotting (e.g., 3 minutes).

- After customizing the chart settings to your preference, click “OK” to create the chart.
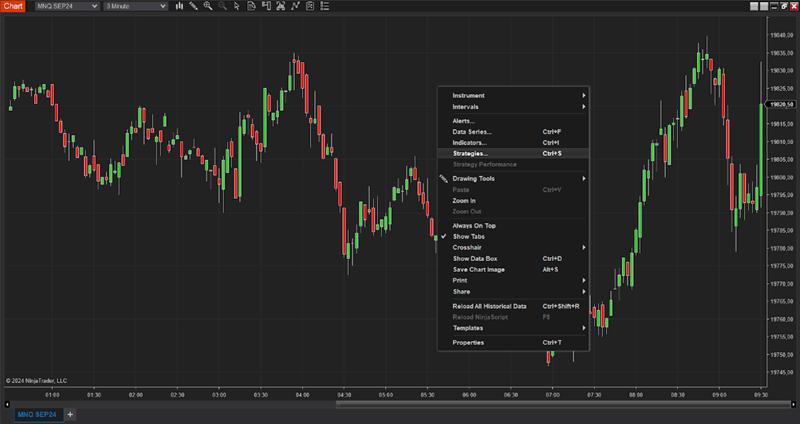
2. Select Your Strategy
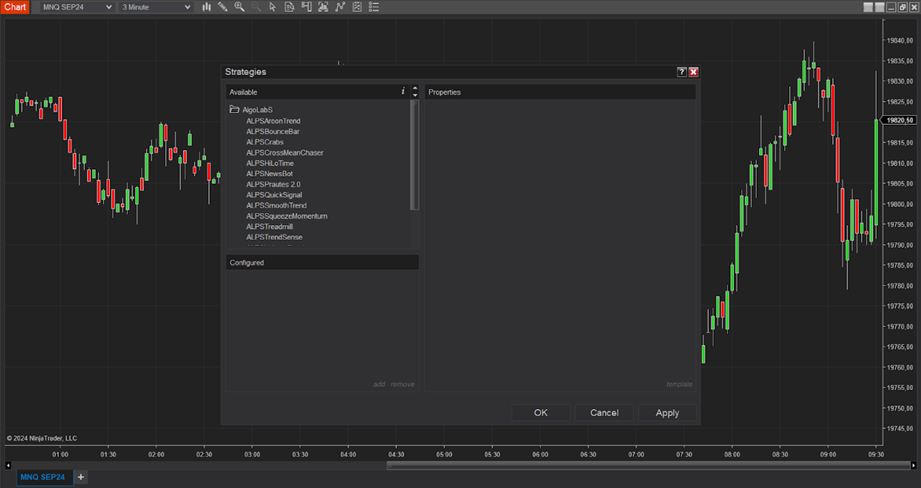
- A window will open showing all the strategies available on your NinjaTrader 8 platform.
- Locate the desired strategy in the AlgoLabS folder.
- Double-click on the strategy name to begin configuration.
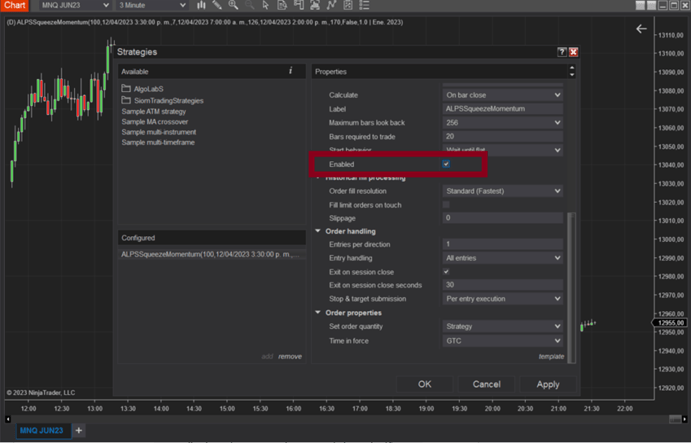
3. Adjust Strategy Parameters
- Once selected, the strategy’s properties will appear in the configuration window.
- Carefully review and adjust the parameters to suit your needs and preferences.
- Save the changes after making adjustments.
To assist you in this process, use the “-parámetros-bots” channel in the ALGOLAB Discord or refer to the recommended parameters provided on the SiomTrading website. You can find these parameters in the documentation section: [Link to Parameters].

4. Recommended Settings
The recommended settings for each bot are provided by the SiomTrading developers. While these are optimized suggestions, they are not the only possible configurations. The optimal settings depend on:
- The size of the account where the bot will operate.
- The level of risk you are willing to take.

5. Important Configuration Details
Account Selection:
- In the “Account” field, choose the account where the bot will execute trades.
Order Quantity:
- Set “Set Order Quantity” to “Default quantity”.
- In the “Default quantity” field, enter the number of contracts based on the risk you want to assume.

2. Enable the Bot from the Control Panel
- Go to the Control Panel in NinjaTrader and open the Strategies tab.
- You will see a list of all the automated strategies you’ve configured.
- Locate the desired strategy and click the “Enabled” button next to it to turn it on or off as needed.
.
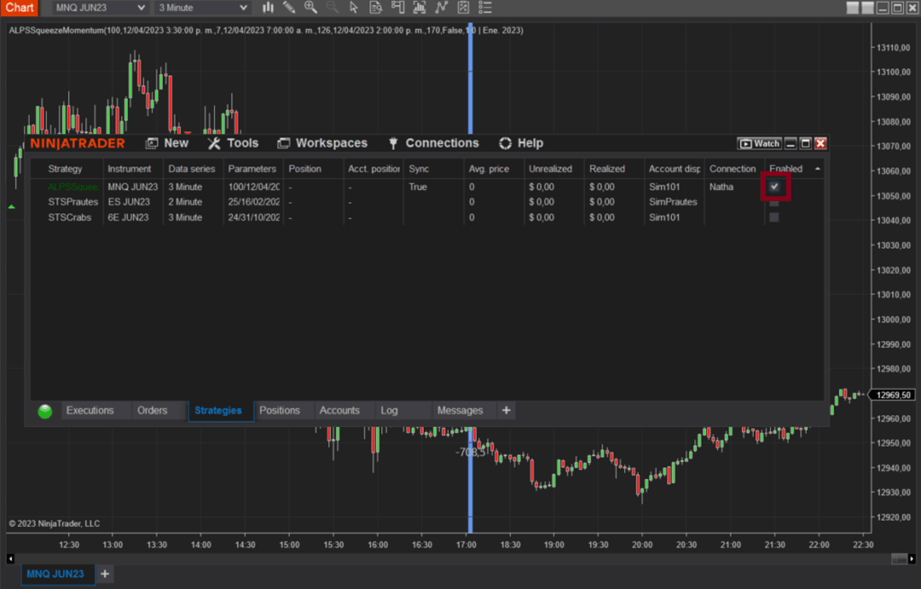

3. Confirm the Strategy is Active
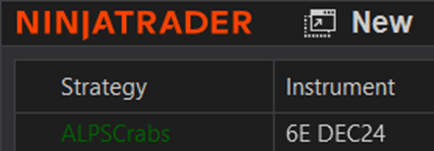
- Ensure that the strategy name appears in green in the “Strategy” field of the Control Panel.
- This indicates that the strategy is running correctly.


In the new window:
- Choose the Asset: Use the dropdown menu to select the asset you want to trade or analyze.
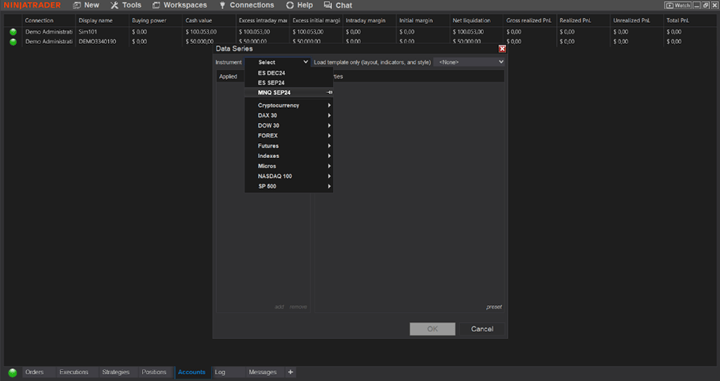
Set the Time Frame:
- Under “Type”, choose the desired time interval (e.g., minutes).
- Specify the amount of time to plot the price (e.g., 3 minutes).
Click “OK” to create and open the chart.

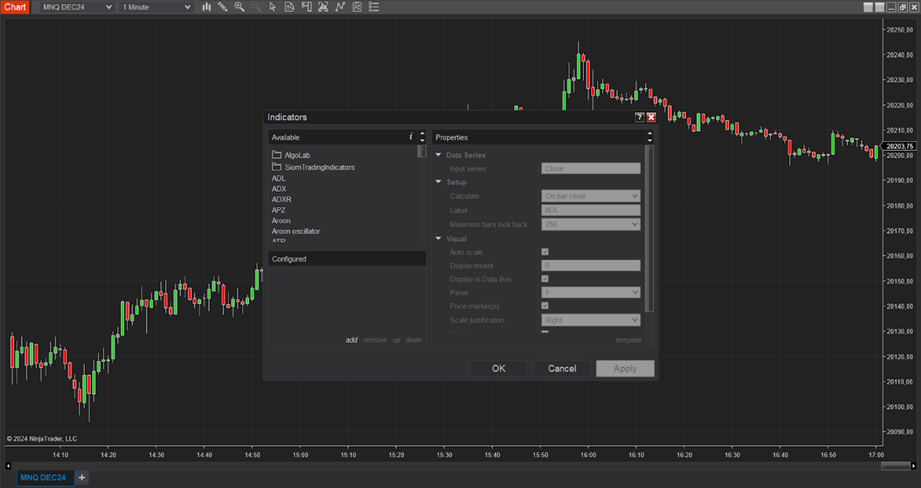
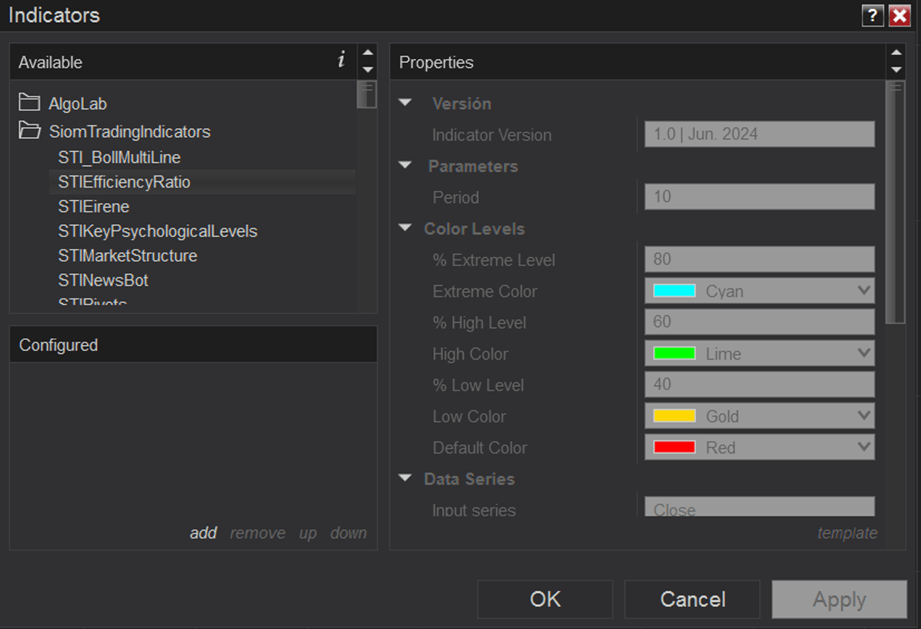
2. Select the Desired Indicator
- A window will appear displaying all the indicators available on your platform.
- Locate Bluechip indicators in the “AlgoLab” or “BluechipIndicators” folders.
- Double-click on the name of the indicator you want to use.
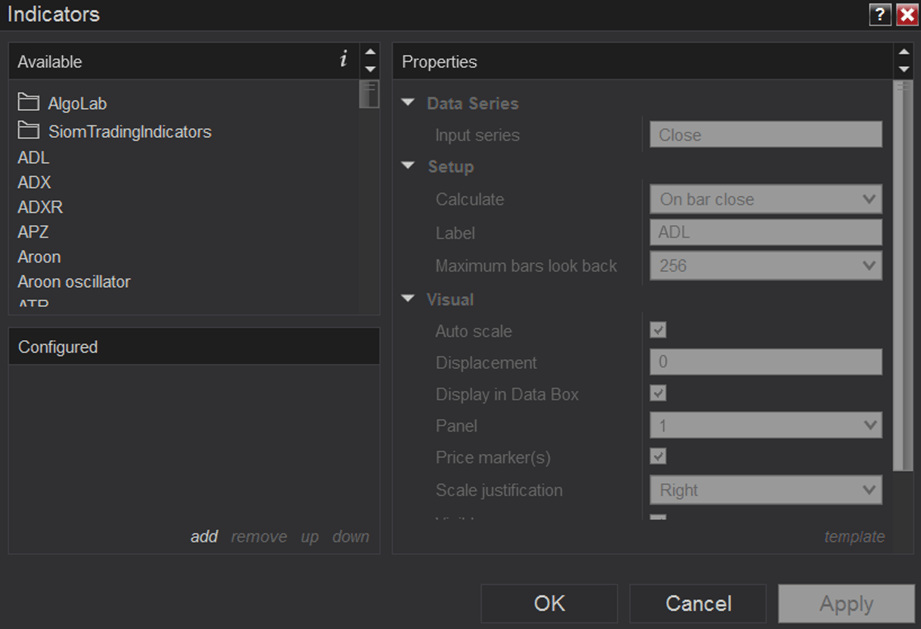
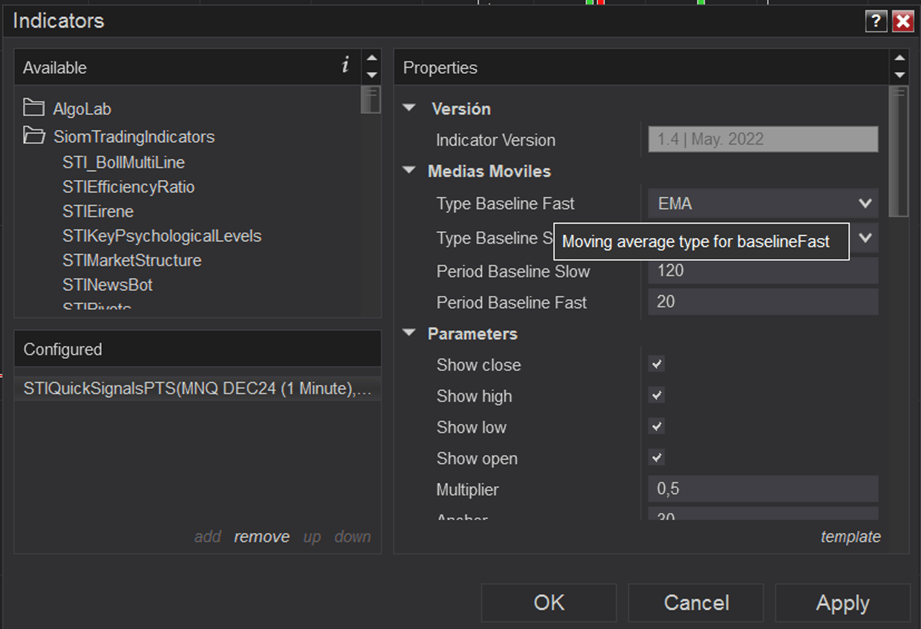
3. Configure the Indicator
- After selecting the indicator, its properties will become editable in the window.
- Adjust the parameters to customize the indicator to your trading strategy or preferences.
- Carefully review each parameter before making changes.
- Once you are satisfied with the settings, click “Apply” to activate the changes.
4. Finalize and Save
- After applying the changes, click “OK” to close the indicator configuration window.
- The indicator will now appear on your chart, ready for use.
Now you can fully customize and utilize the indicators for your trading activities.
